
Installation – Quickstart
Wikibase Suite lets you run your own knowledge graph – similar to Wikidata – on your own server. It comes ready to use with all the tools you need: a web interface to manage your data, a search engine, a query tool, and secure HTTPS out of the box.
Before You Start – What You Need
Step 1 – Get a Server (VPS)
You need a Linux-based server that meets these minimum requirements:
- Server with a public IP address
- Processor type: x86_64 (AMD/Intel)
- Memory RAM: min. 8 GB
- Storage (disk space): min. 4 GB
- Operating System: Ubuntu (recommended)
Follow your cloud provider’s documentation to create and start a new server with these settings.
ℹ️ What is a VPS? A VPS (Virtual Private Server) is a remote computer hosted by a cloud provider that runs 24/7 and is accessible from anywhere on the internet. You don’t physically own it – you rent it and access it remotely. Prices typically start at around €20/month.
Step 2 – Get A Domain and Subdomain
You need two domain configurations – a main domain for your Wikibase and a subdomain for the Query Service tool:
- Wikibase: e.g. yourdomain.com
- Query Service: e.g. query.yourdomain.com
How to configure domains for your server (VPS)
- Log in to your domain provider’s control panel
- Go to the DNS Settings section
- Delete all AAAA records
- Add these two A records:
| Record name | Points to | Type |
|---|---|---|
@ |
Enter: IP address from server | A |
query |
Enter: IP address from server | A |
ℹ️ What is a domain? A domain is a web address like mywikibase.org. You need to buy a domain at your VPS provider or a dedicated domain provider such as Namecheap, GoDaddy, or Cloudflare. You point it at your server so people can access your Wikibase through a browser.
ℹ️ The subdomain (query.yourdomain.com) is a sub-address that lives under your main domain. Most domain providers let you create subdomains for free in their DNS settings panel.
ℹ️ What is a DNS A-record? An A-record is a setting in your domain provider’s DNS panel that points your domain name to a specific IP address (your server). Without this, your domain name won’t lead anywhere.
Guides from common providers: Cloudflare, GoDaddy, Namecheap
Connect To Your Server
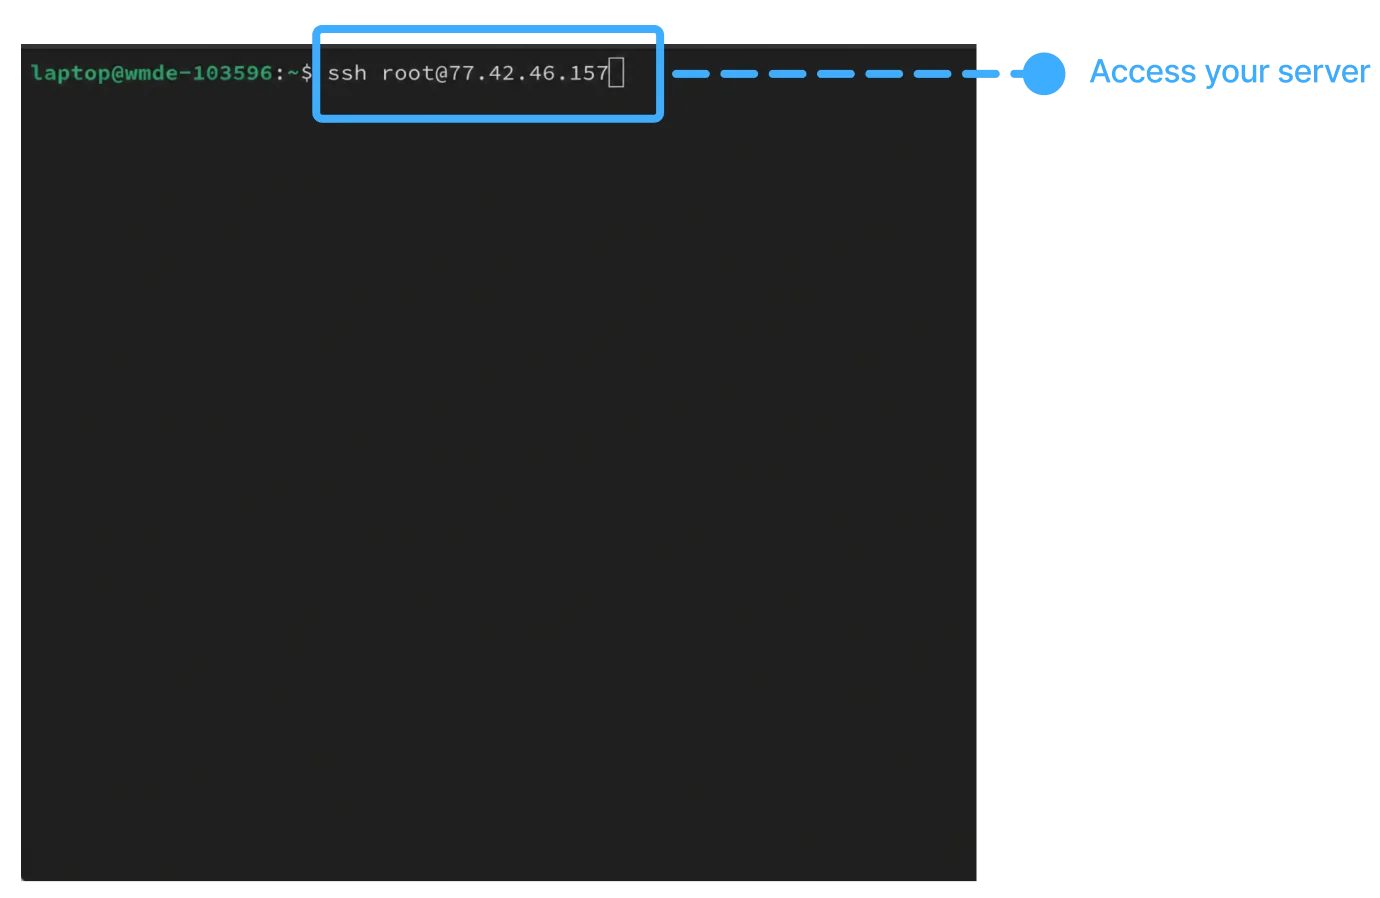
To install Wikibase Suite, you need to access your server by typing commands into a terminal window. Here’s how to connect:
- Open the Terminal app on your computer (Mac/Linux) or Windows Terminal (Windows)
- Type the following command, replacing
ip-addresswith your server’s actual IP address: ssh root@ip-address- Press Enter and enter your server password when prompted
💡 Your server’s IP address and initial password are provided by your cloud provider in your account or via email. Some providers require you to reset the password before first login – check their documentation.
Run the Wikibase Suite Installer
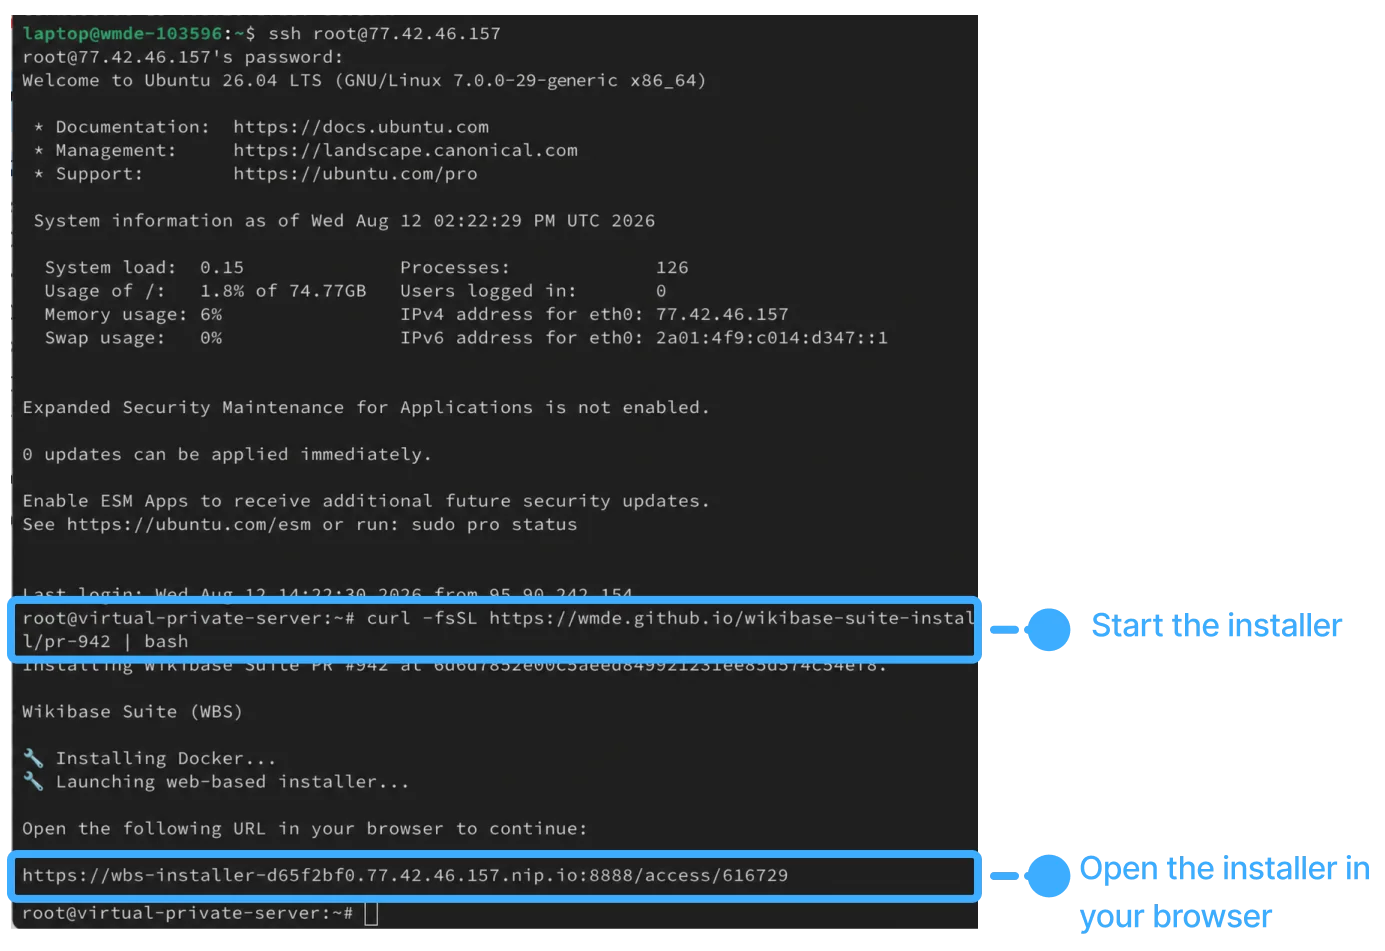
Once you’re connected to your server, run this single command to download and start the Wikibase Suite Installer:
curl -fsSL https://wmde.github.io/wikibase-suite-install | bash
💡 What does this do? This command downloads the WBS installer script and runs it automatically. It sets up Docker (the technology WBS runs on) and prepares all the services needed for your Wikibase. It will take about a minute to complete.
Once it’s done, the terminal will show you a link. Open that link in your web browser to continue with Wikibase Suite Installer.
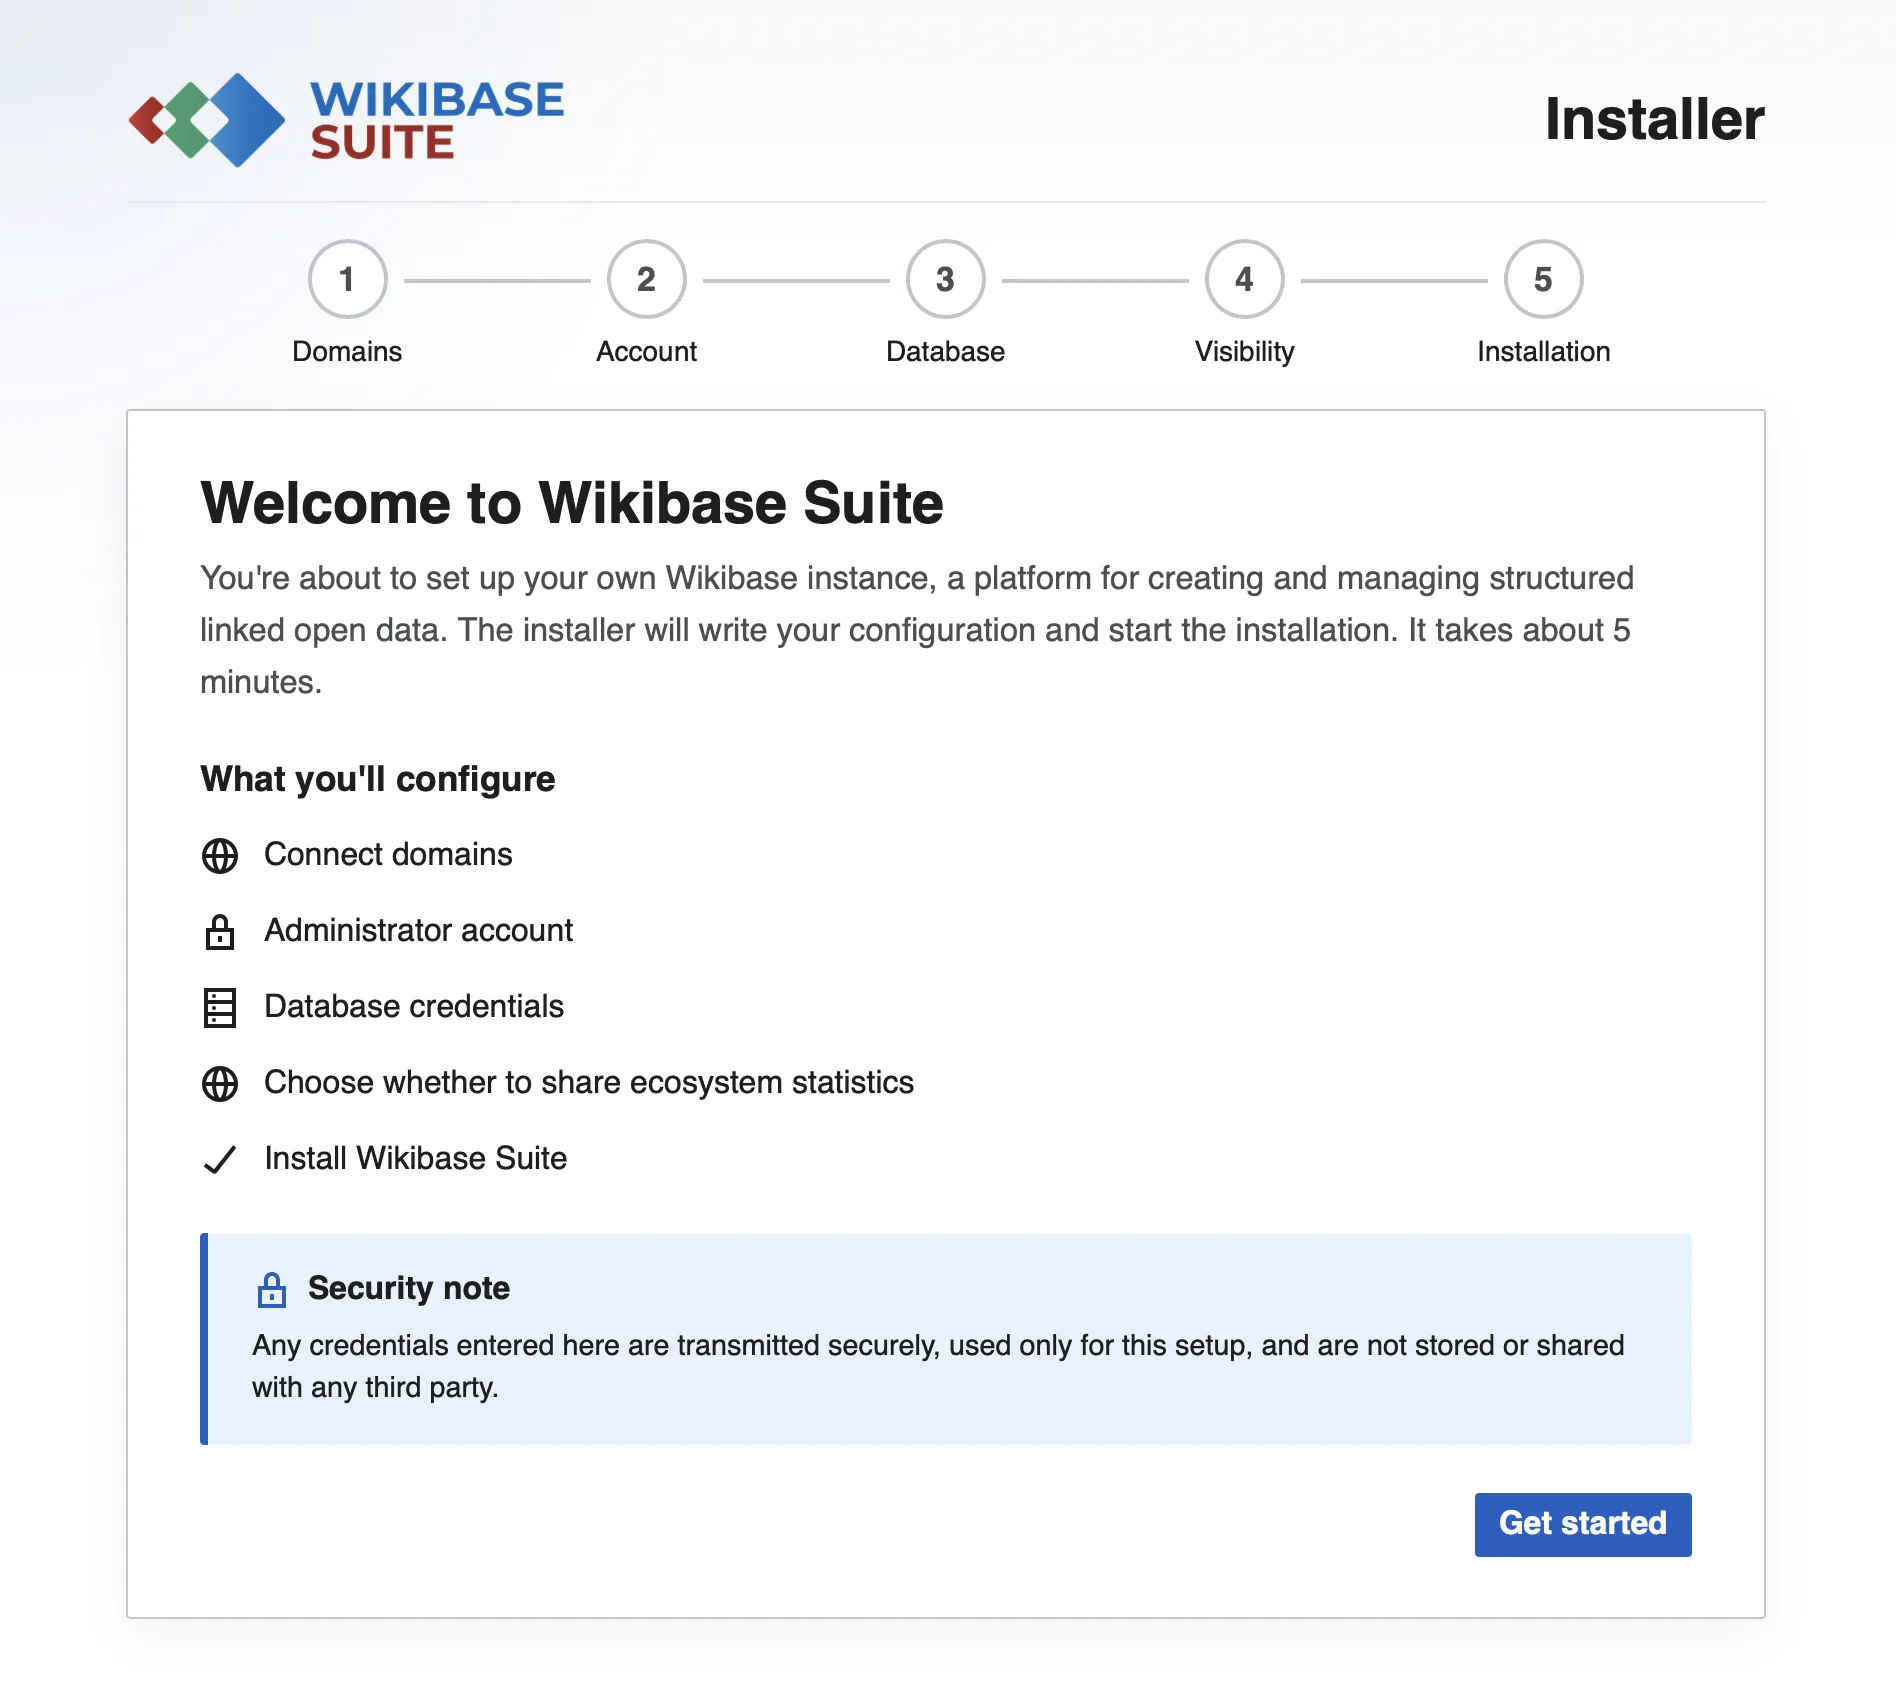
Configure and install Wikibase Suite
The Wikibase Suite Installer will walk you through all the steps to configure and install your Wikibase instance. Here’s what each step asks for:
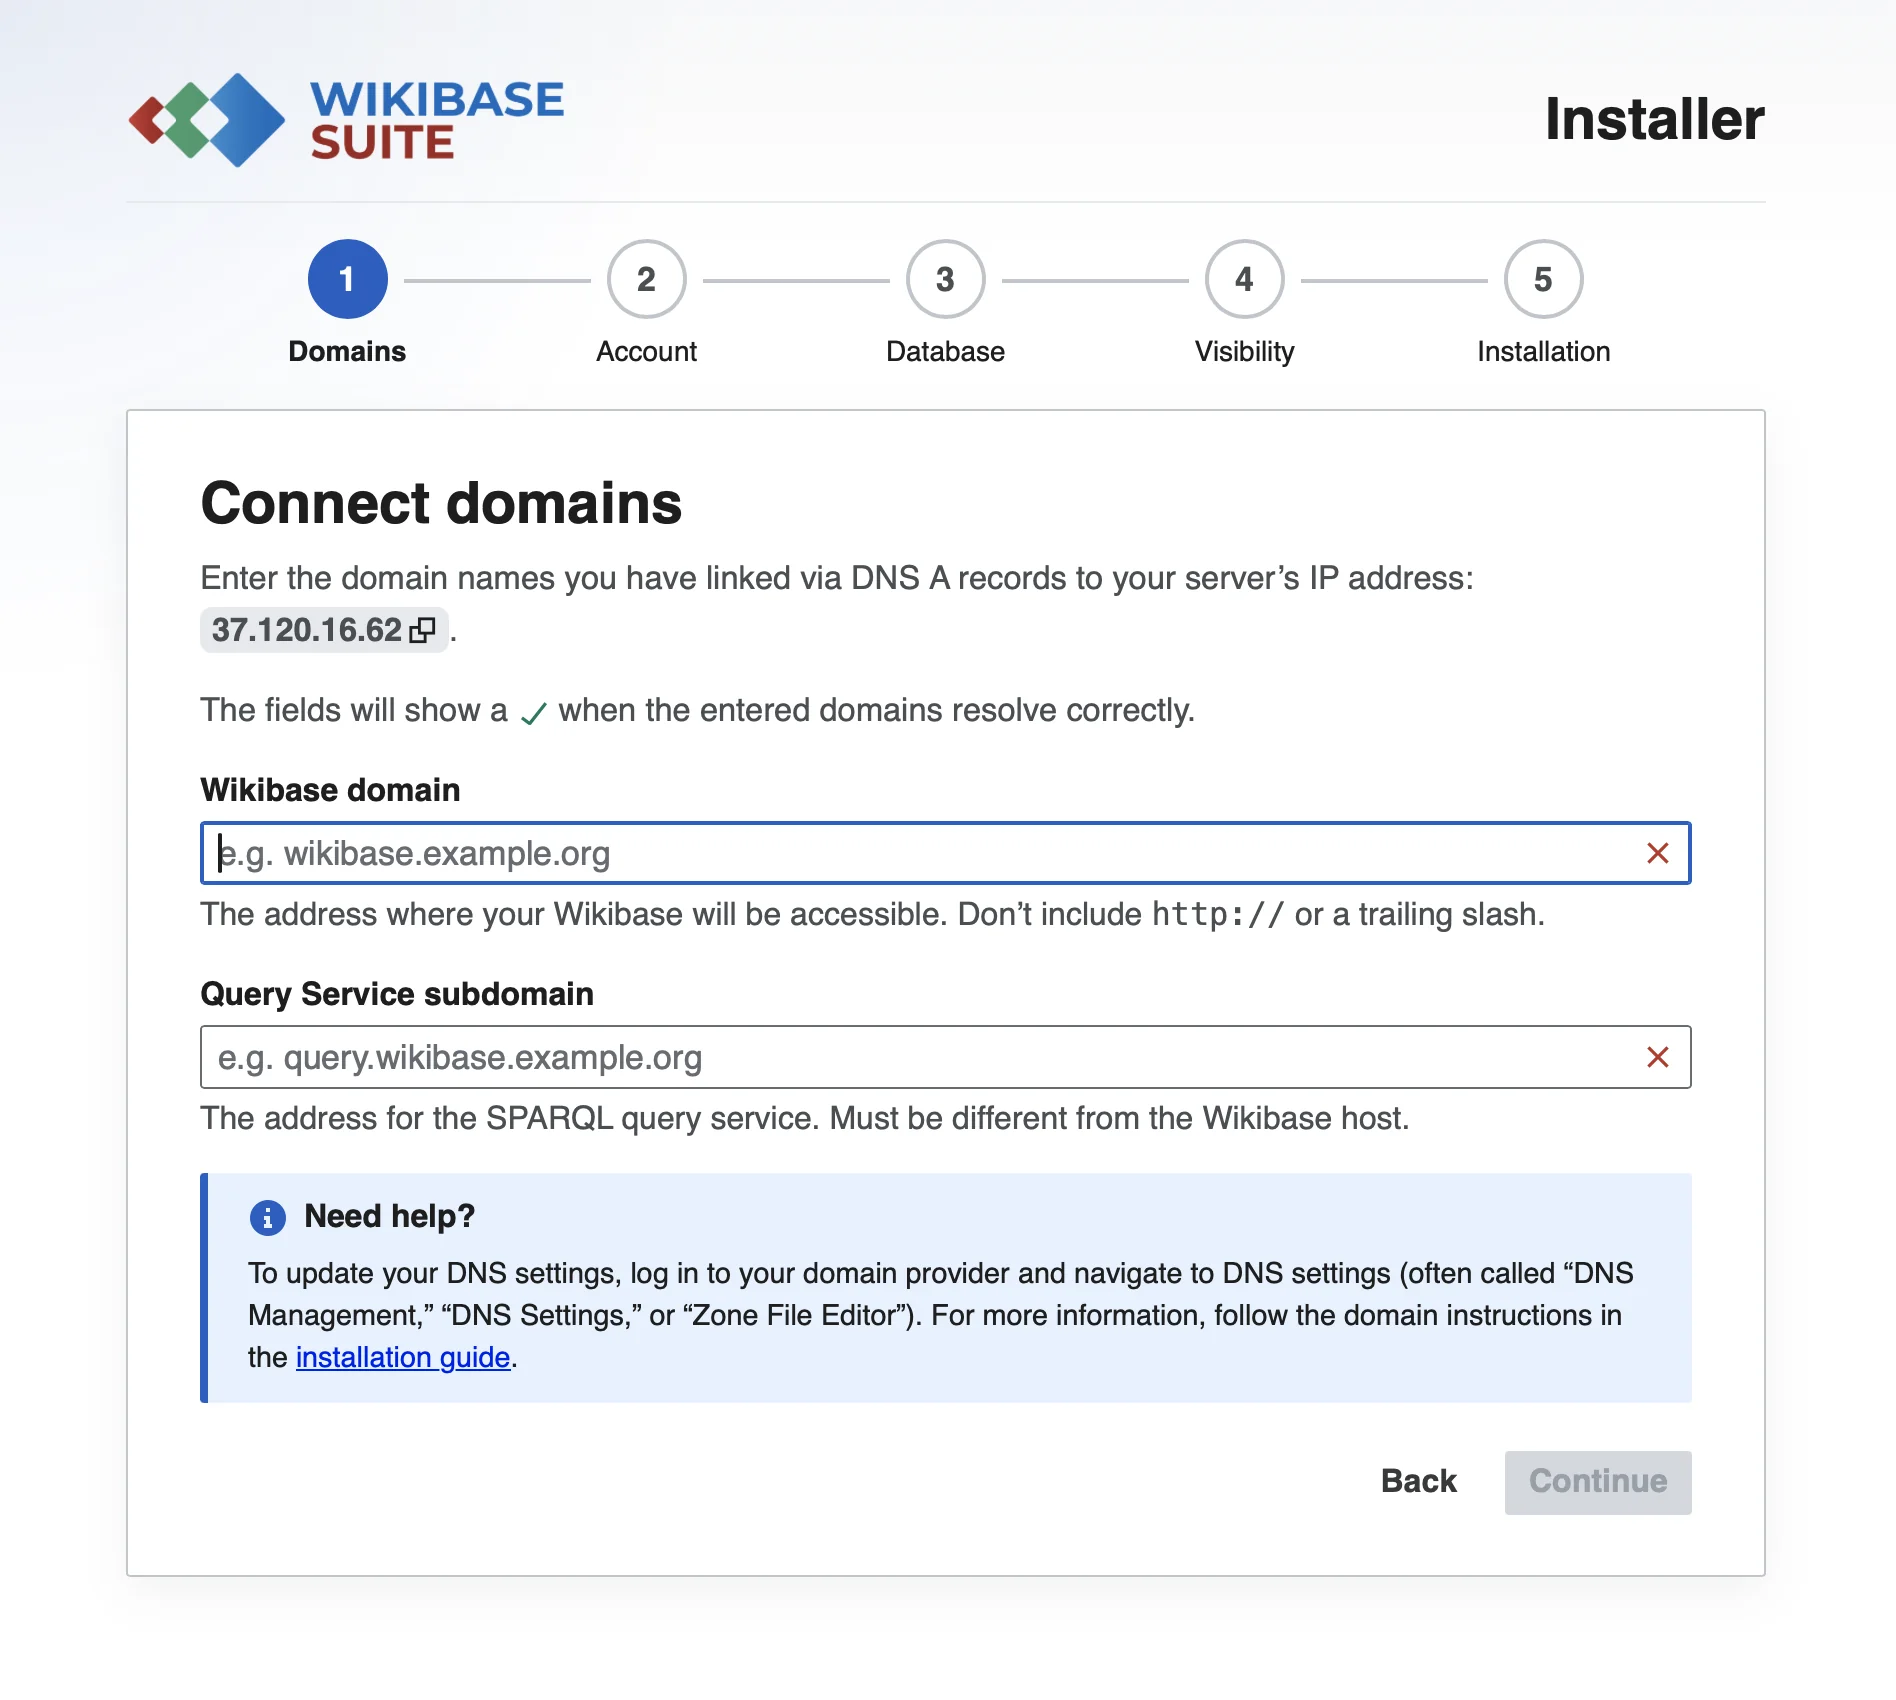
1. Configure domain names
Enter the two web addresses you registered in the requirements step:
- Wikibase (main site):
yourdomain.com - Query Service (query tool):
query.yourdomain.com
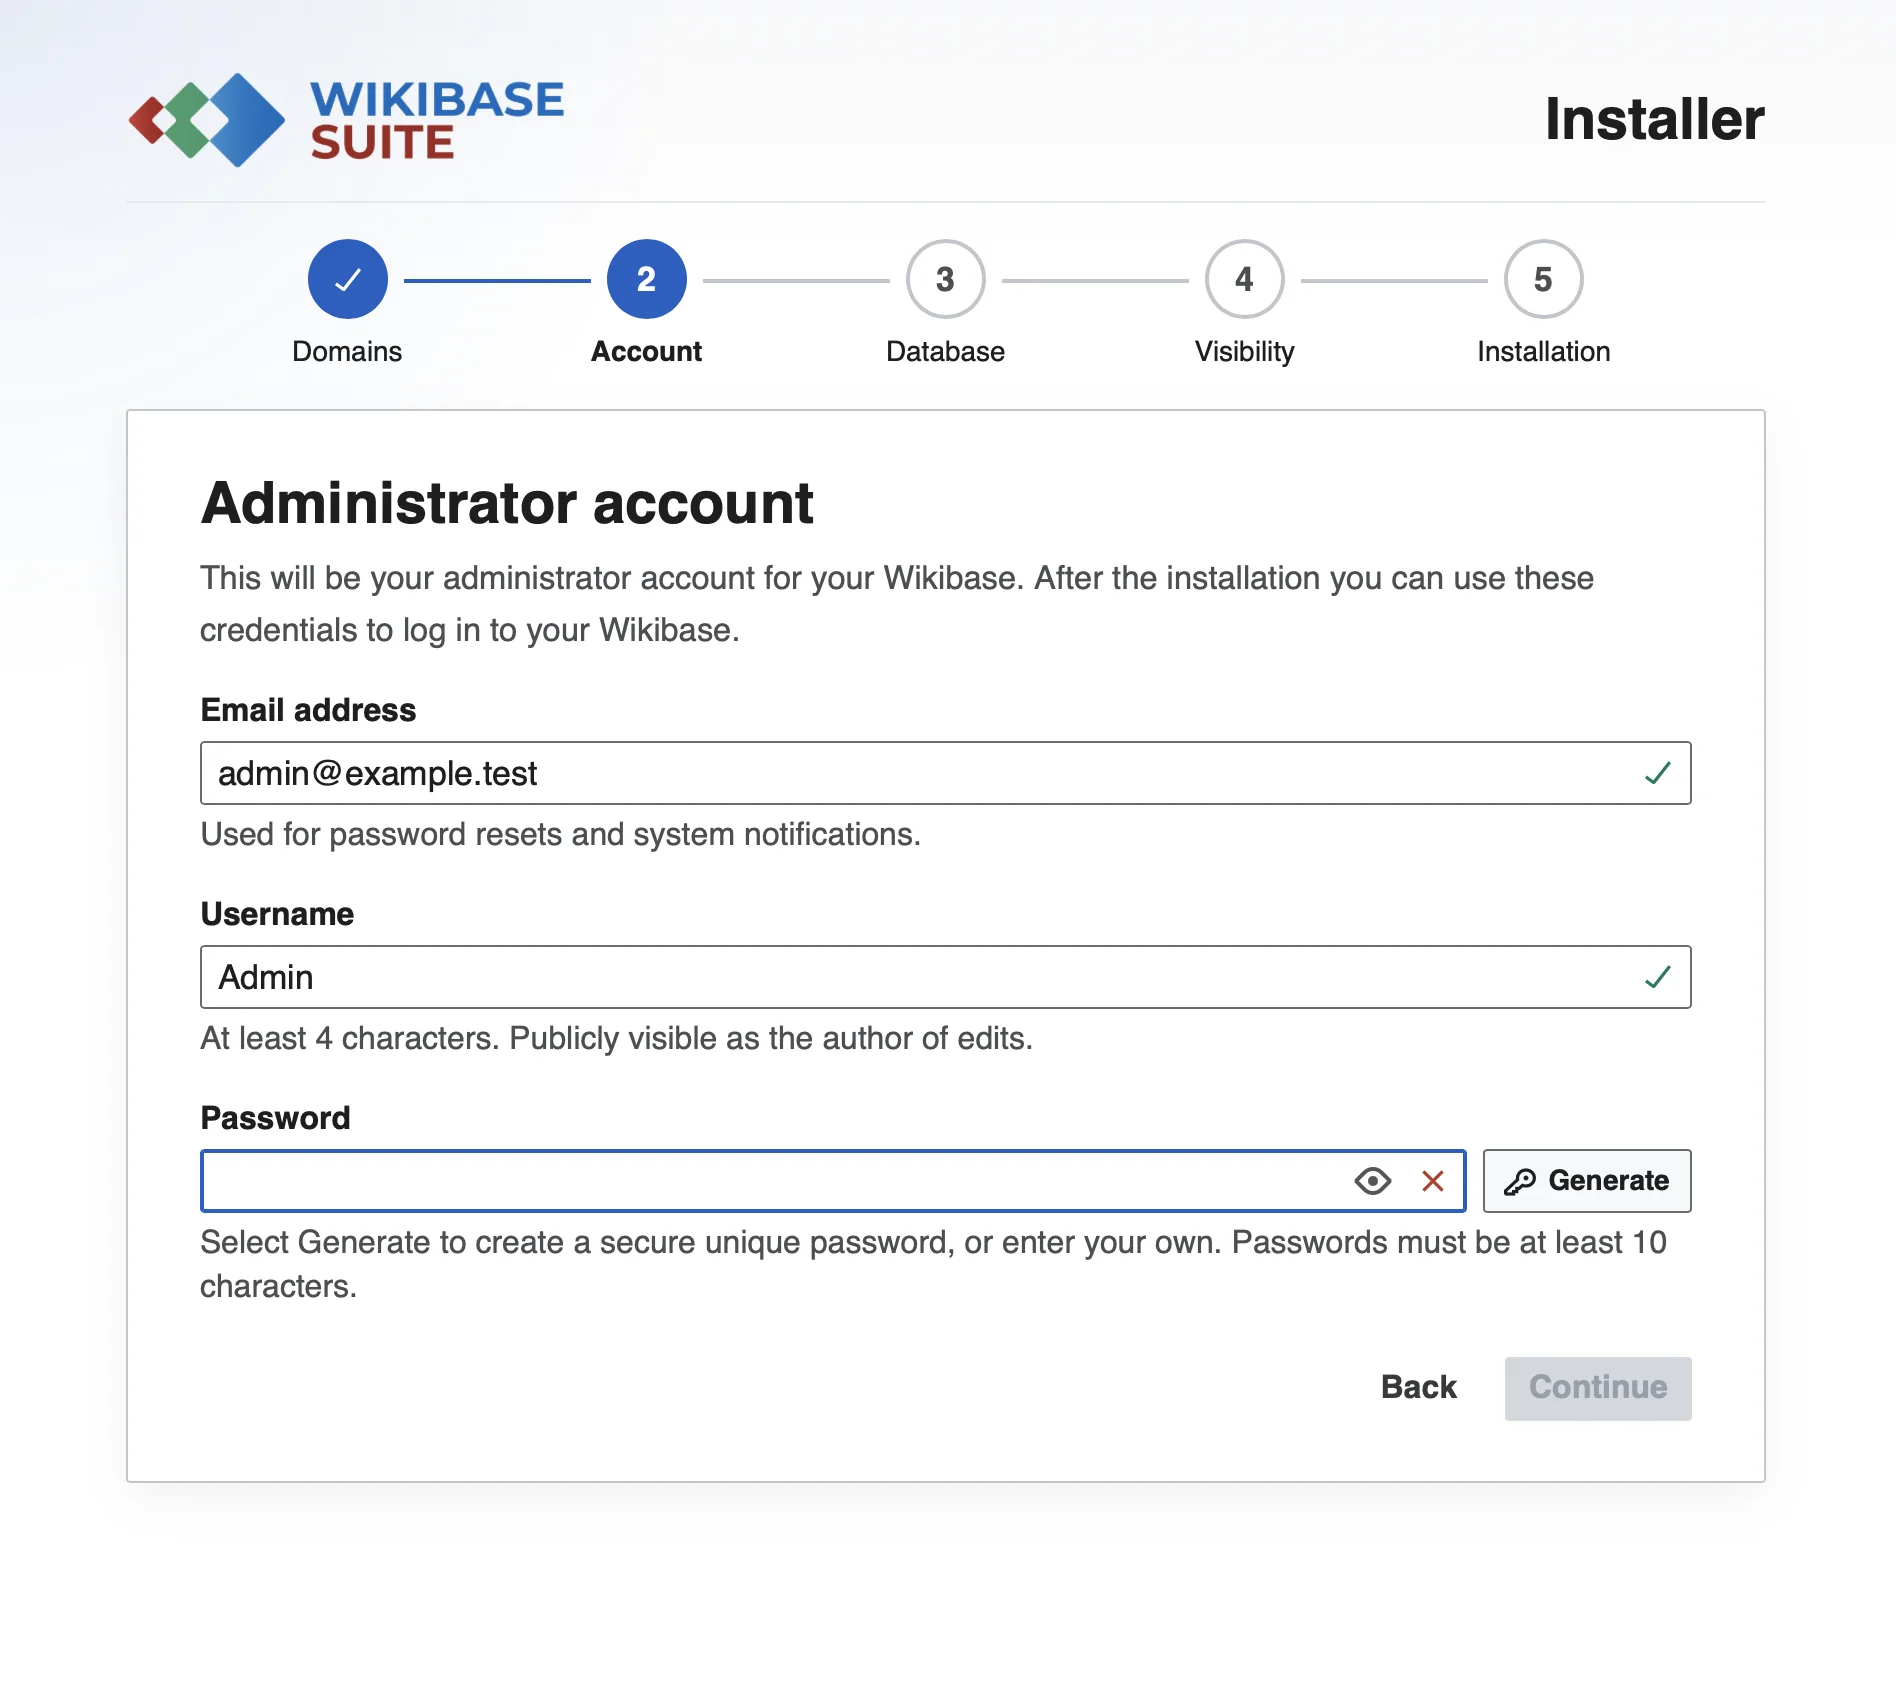
2. Create an admin account
This is your personal login for managing your Wikibase. Fill in:
- Email address – used for account recovery and notifications
- Username – the name you’ll use to log in (publicly visible as author)
- Password – choose something strong (at least 10 characters)
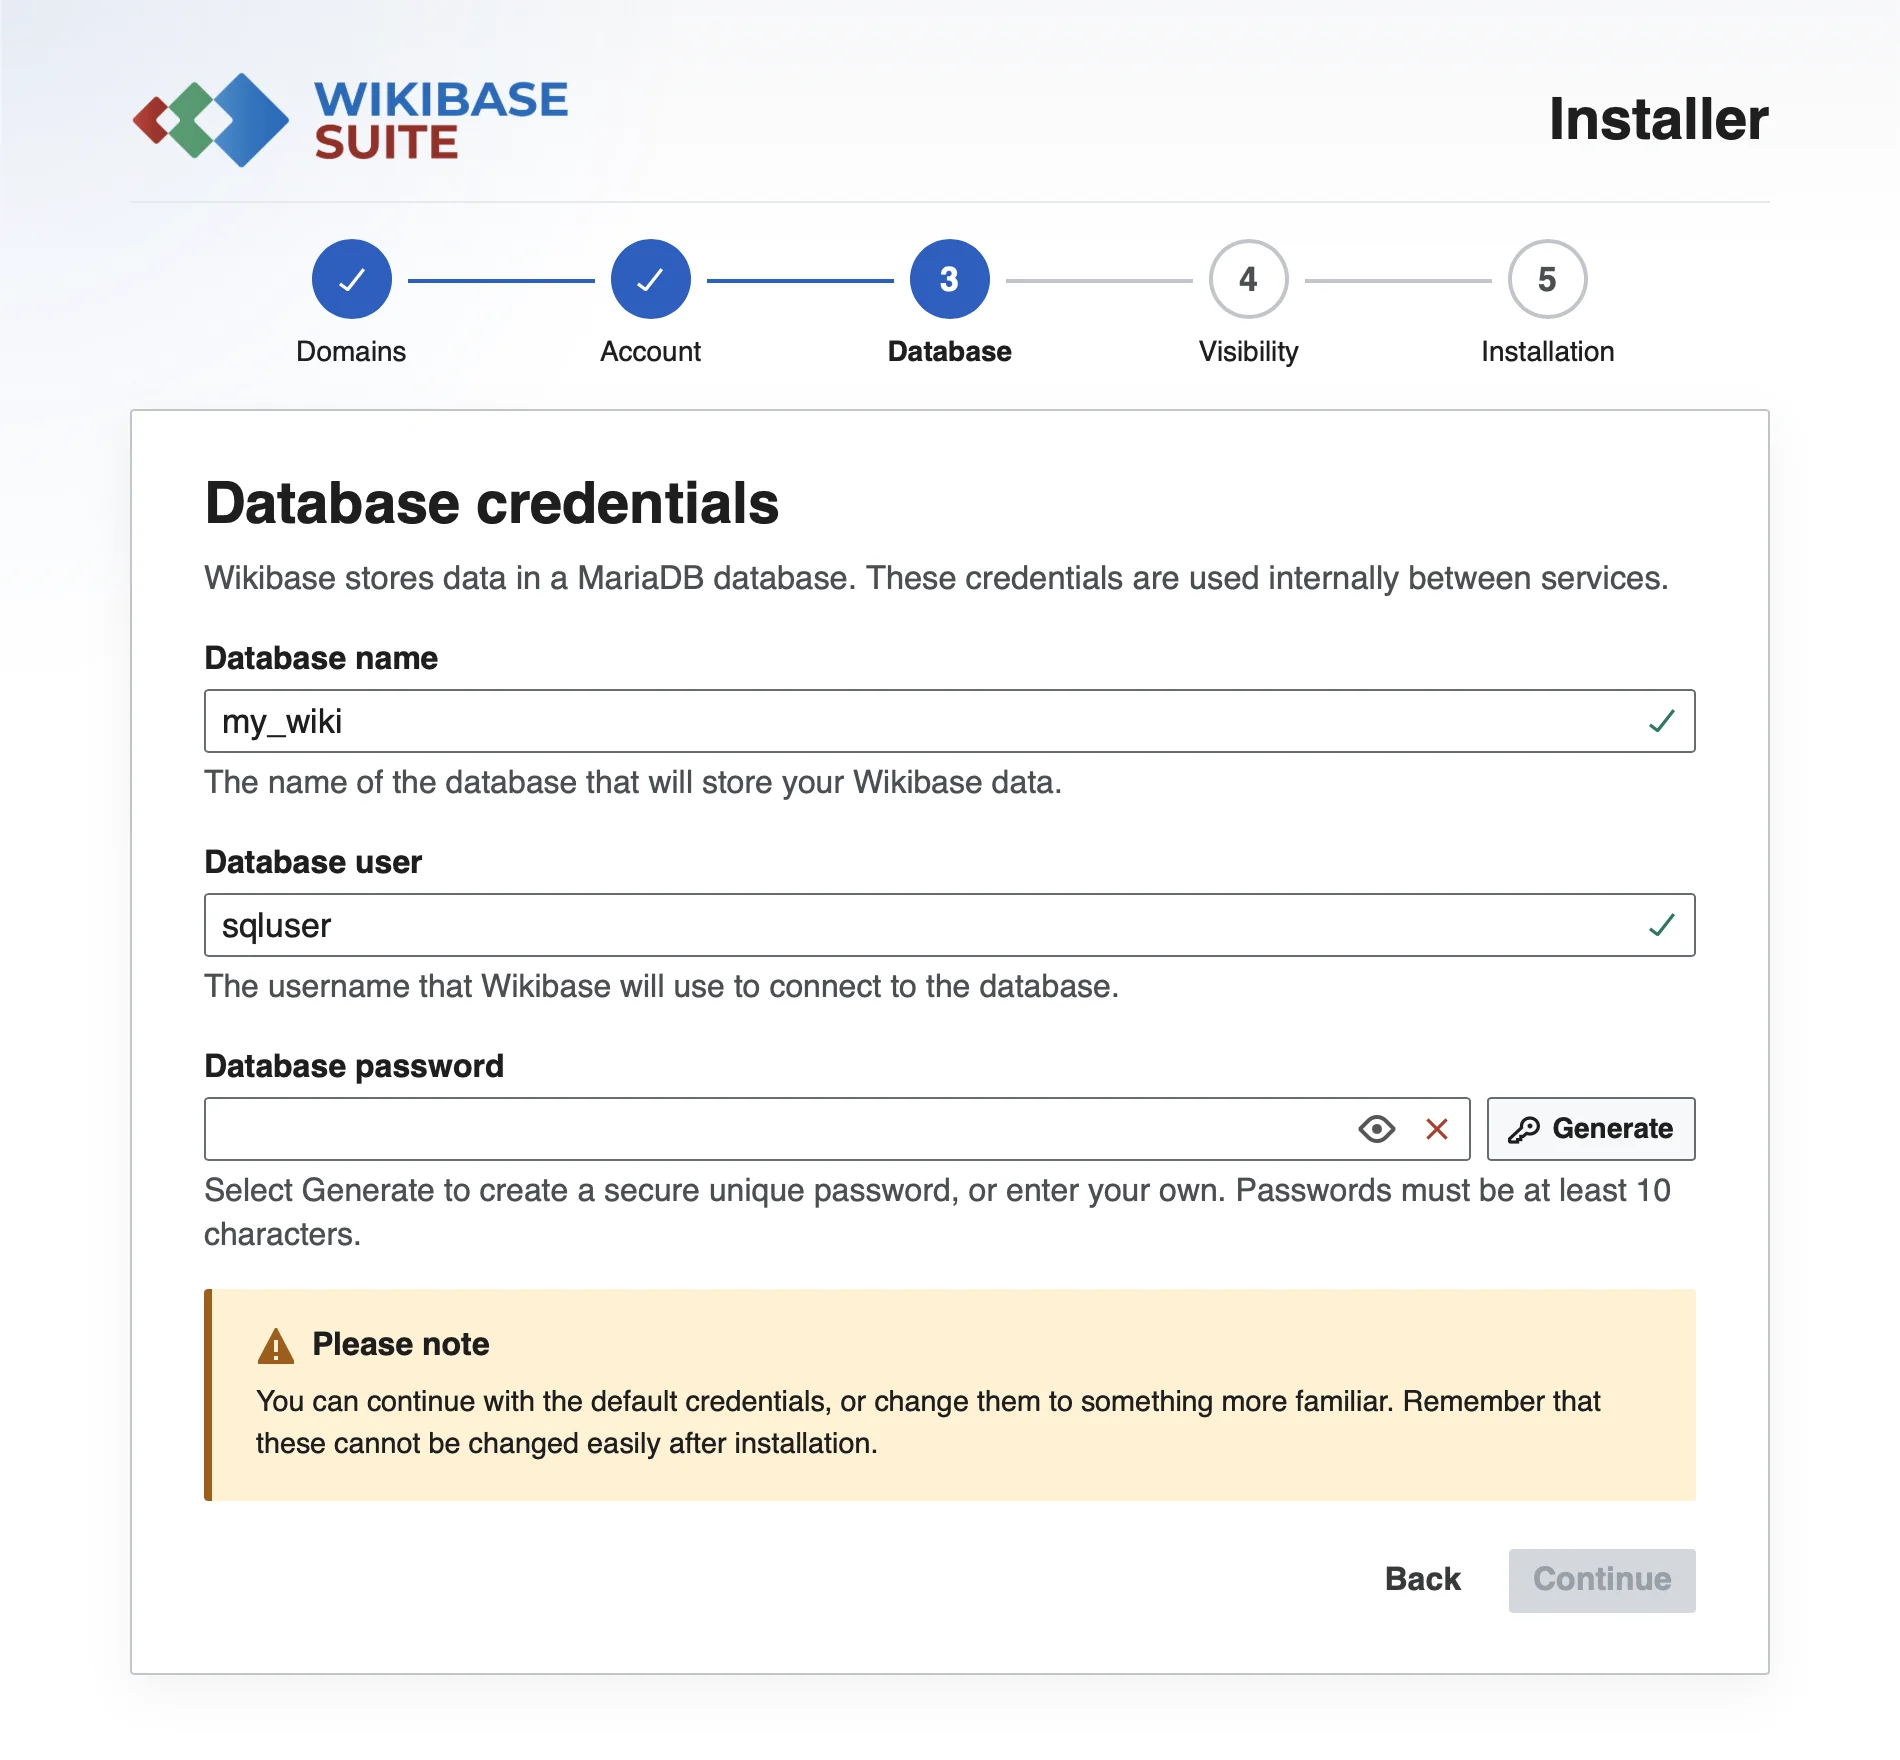
3. Set up database credentials
- Database name and database username – you can leave the defaults unless you have a specific reason to change them.
- Database password – set a strong, unique password
⚠️ Important: The database name and username cannot be changed easily later without resetting your installation. The password can be updated if needed.
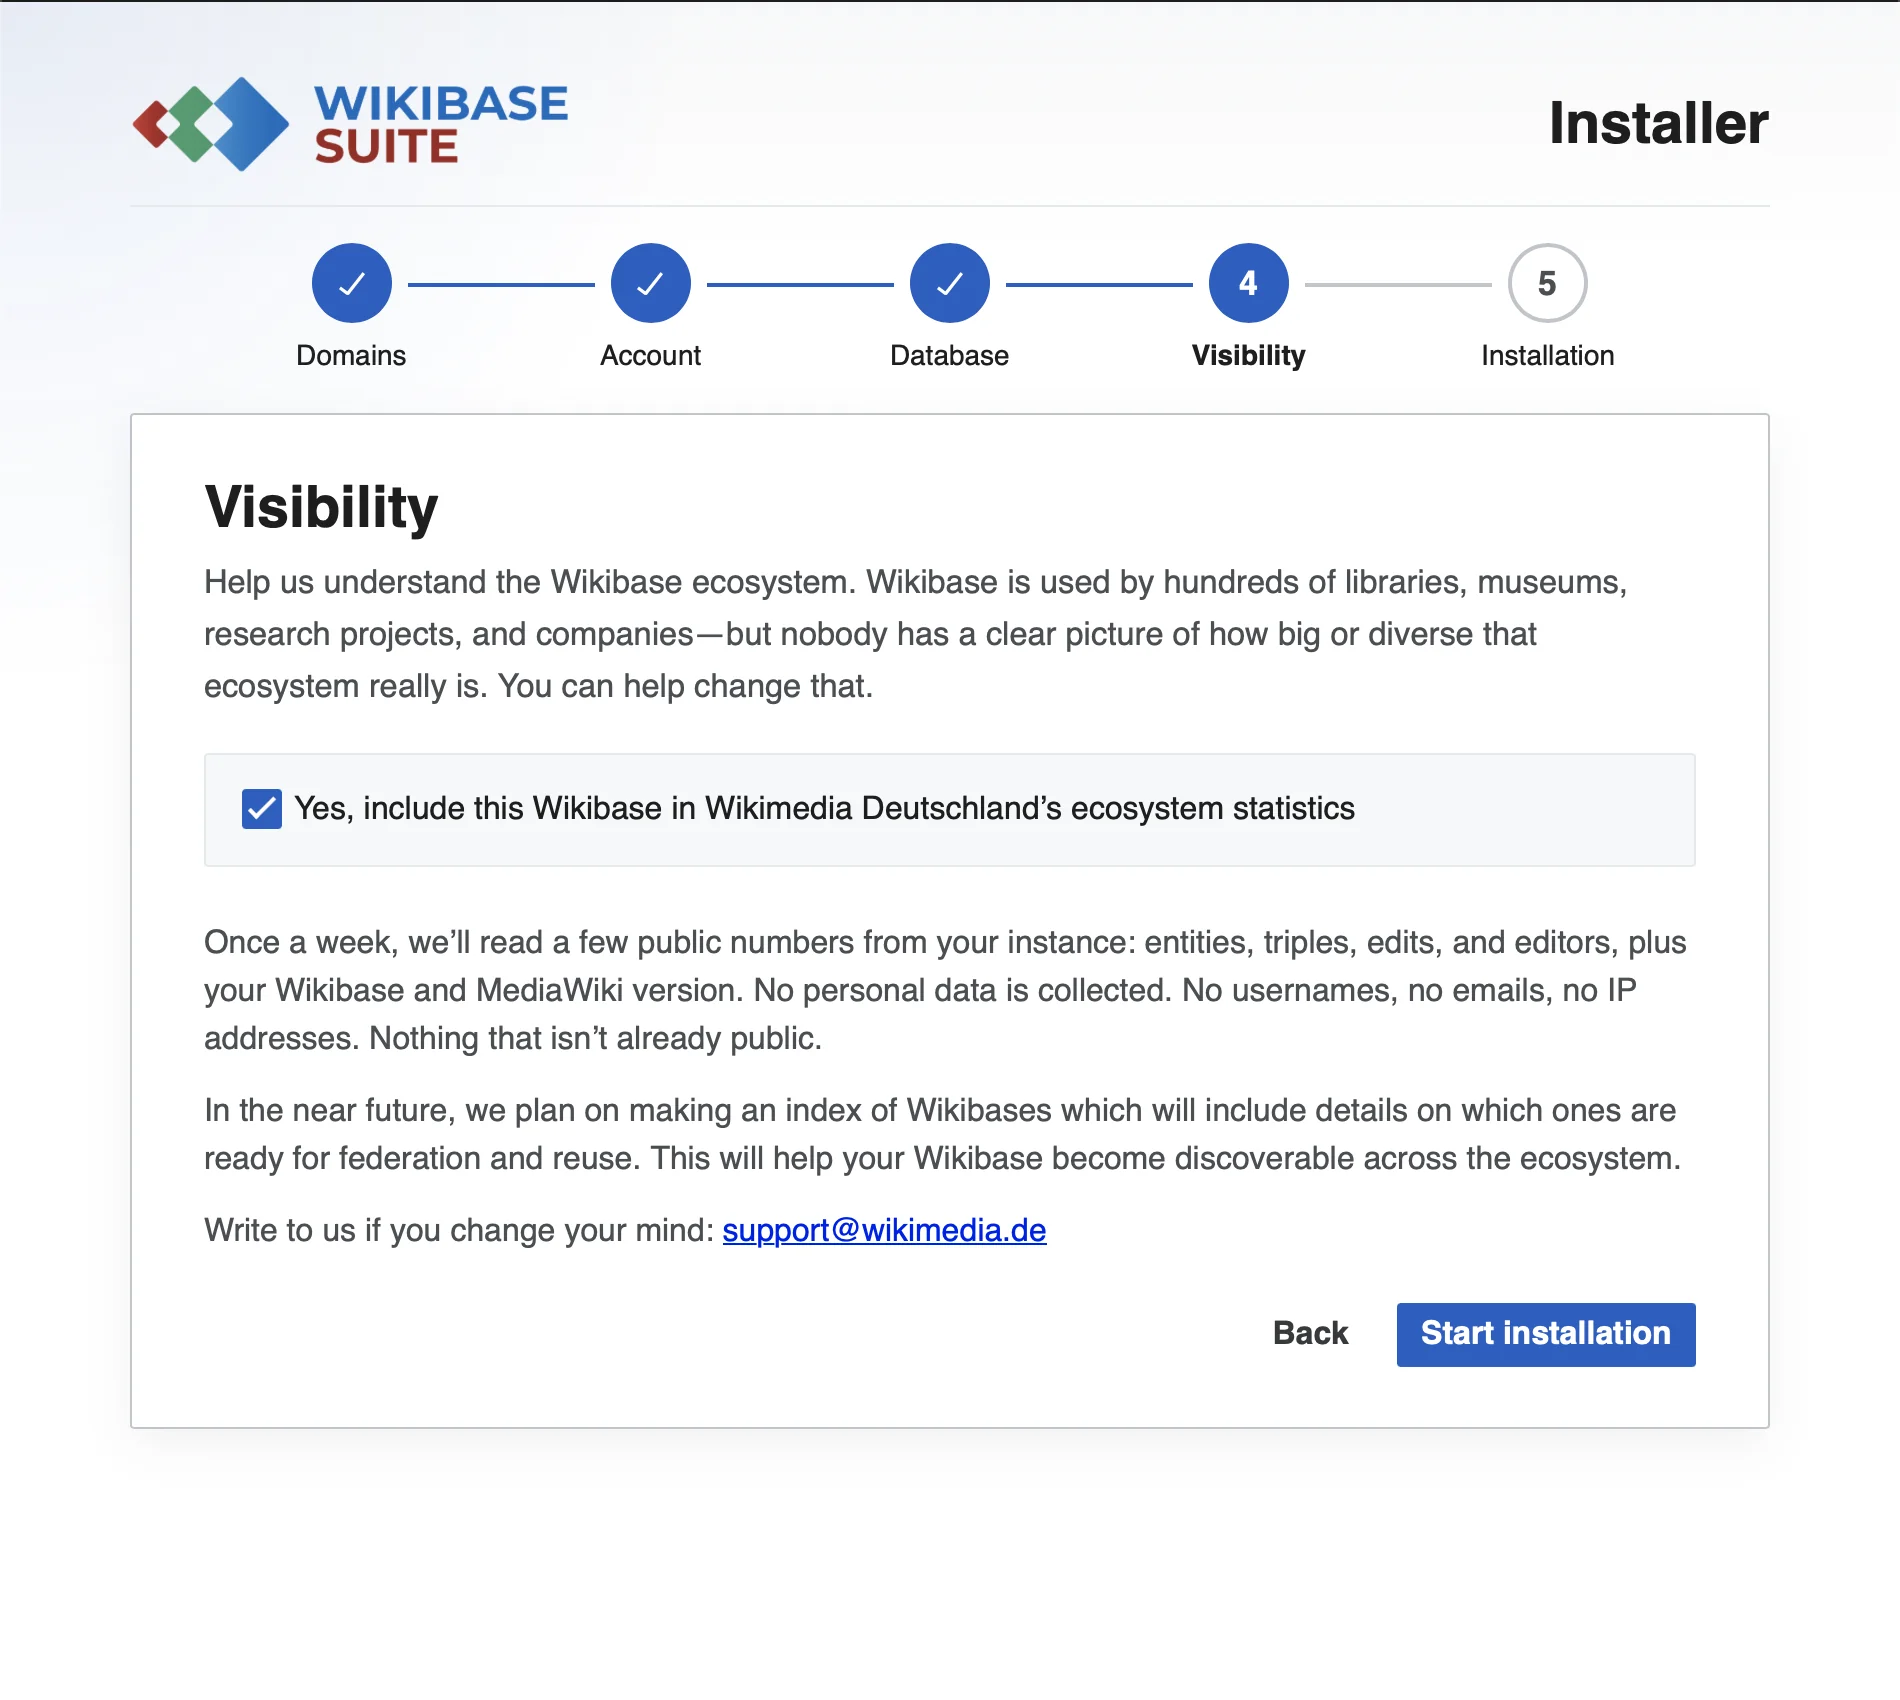
4. Visibility
Help us understand the Wikibase ecosystem. Wikibase is used by hundreds of libraries, museums, research projects and companies — but nobody has a clear picture of how big or how diverse that ecosystem really is. You can help change that by providing some statistics from your Wikibase.
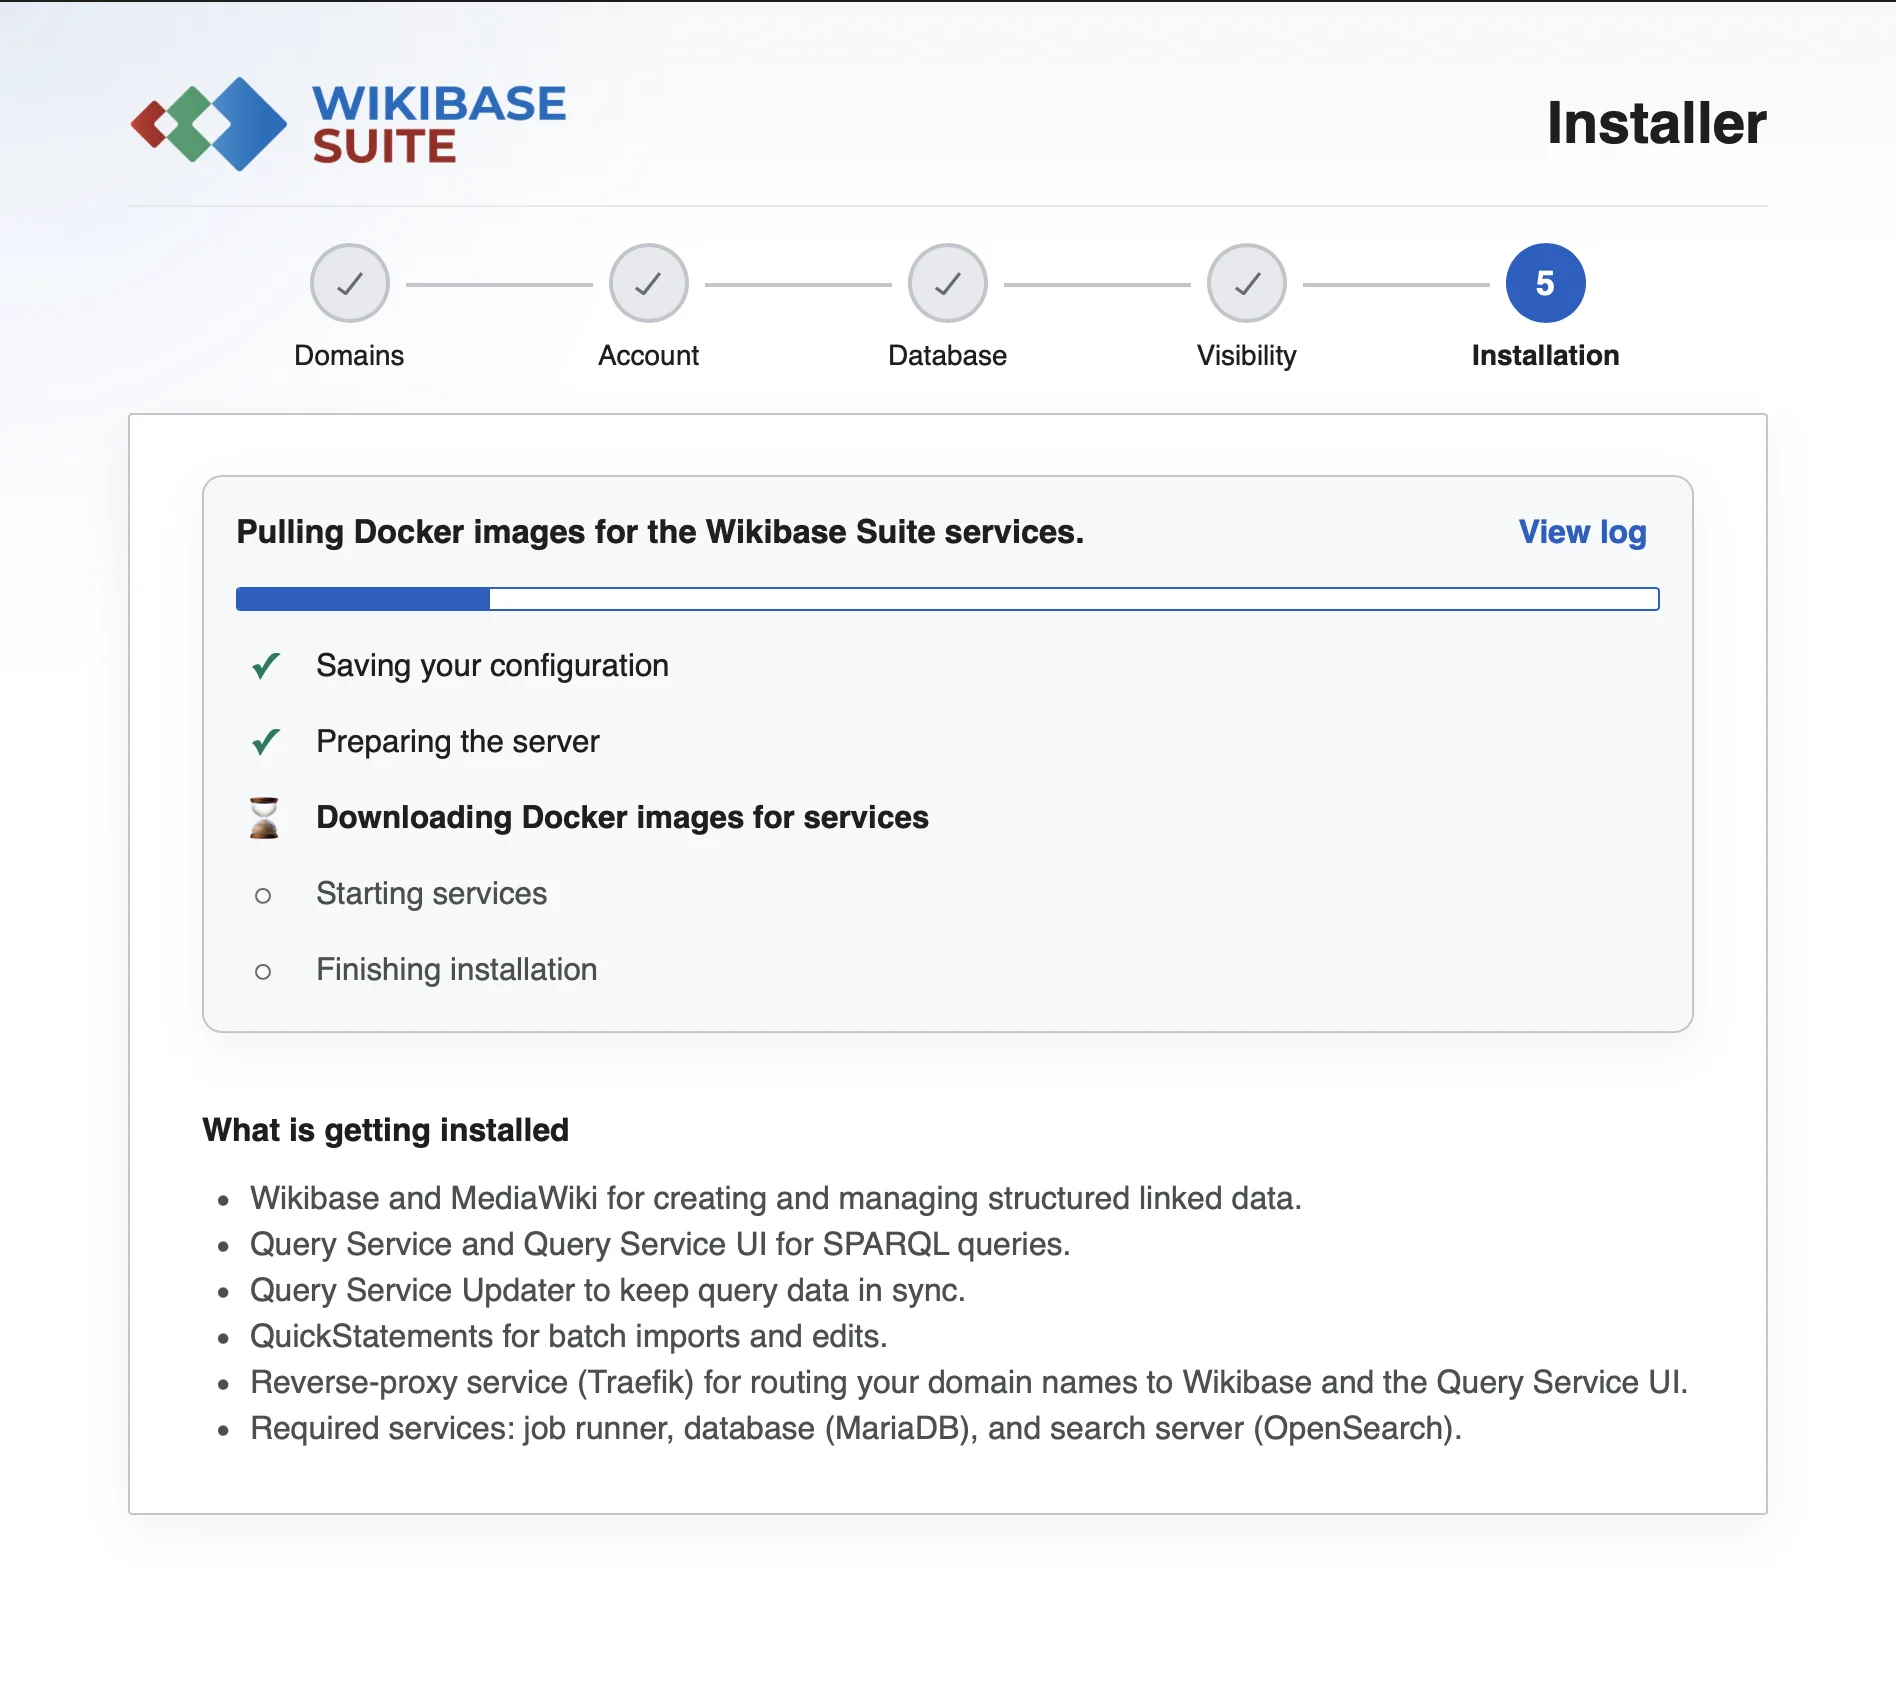
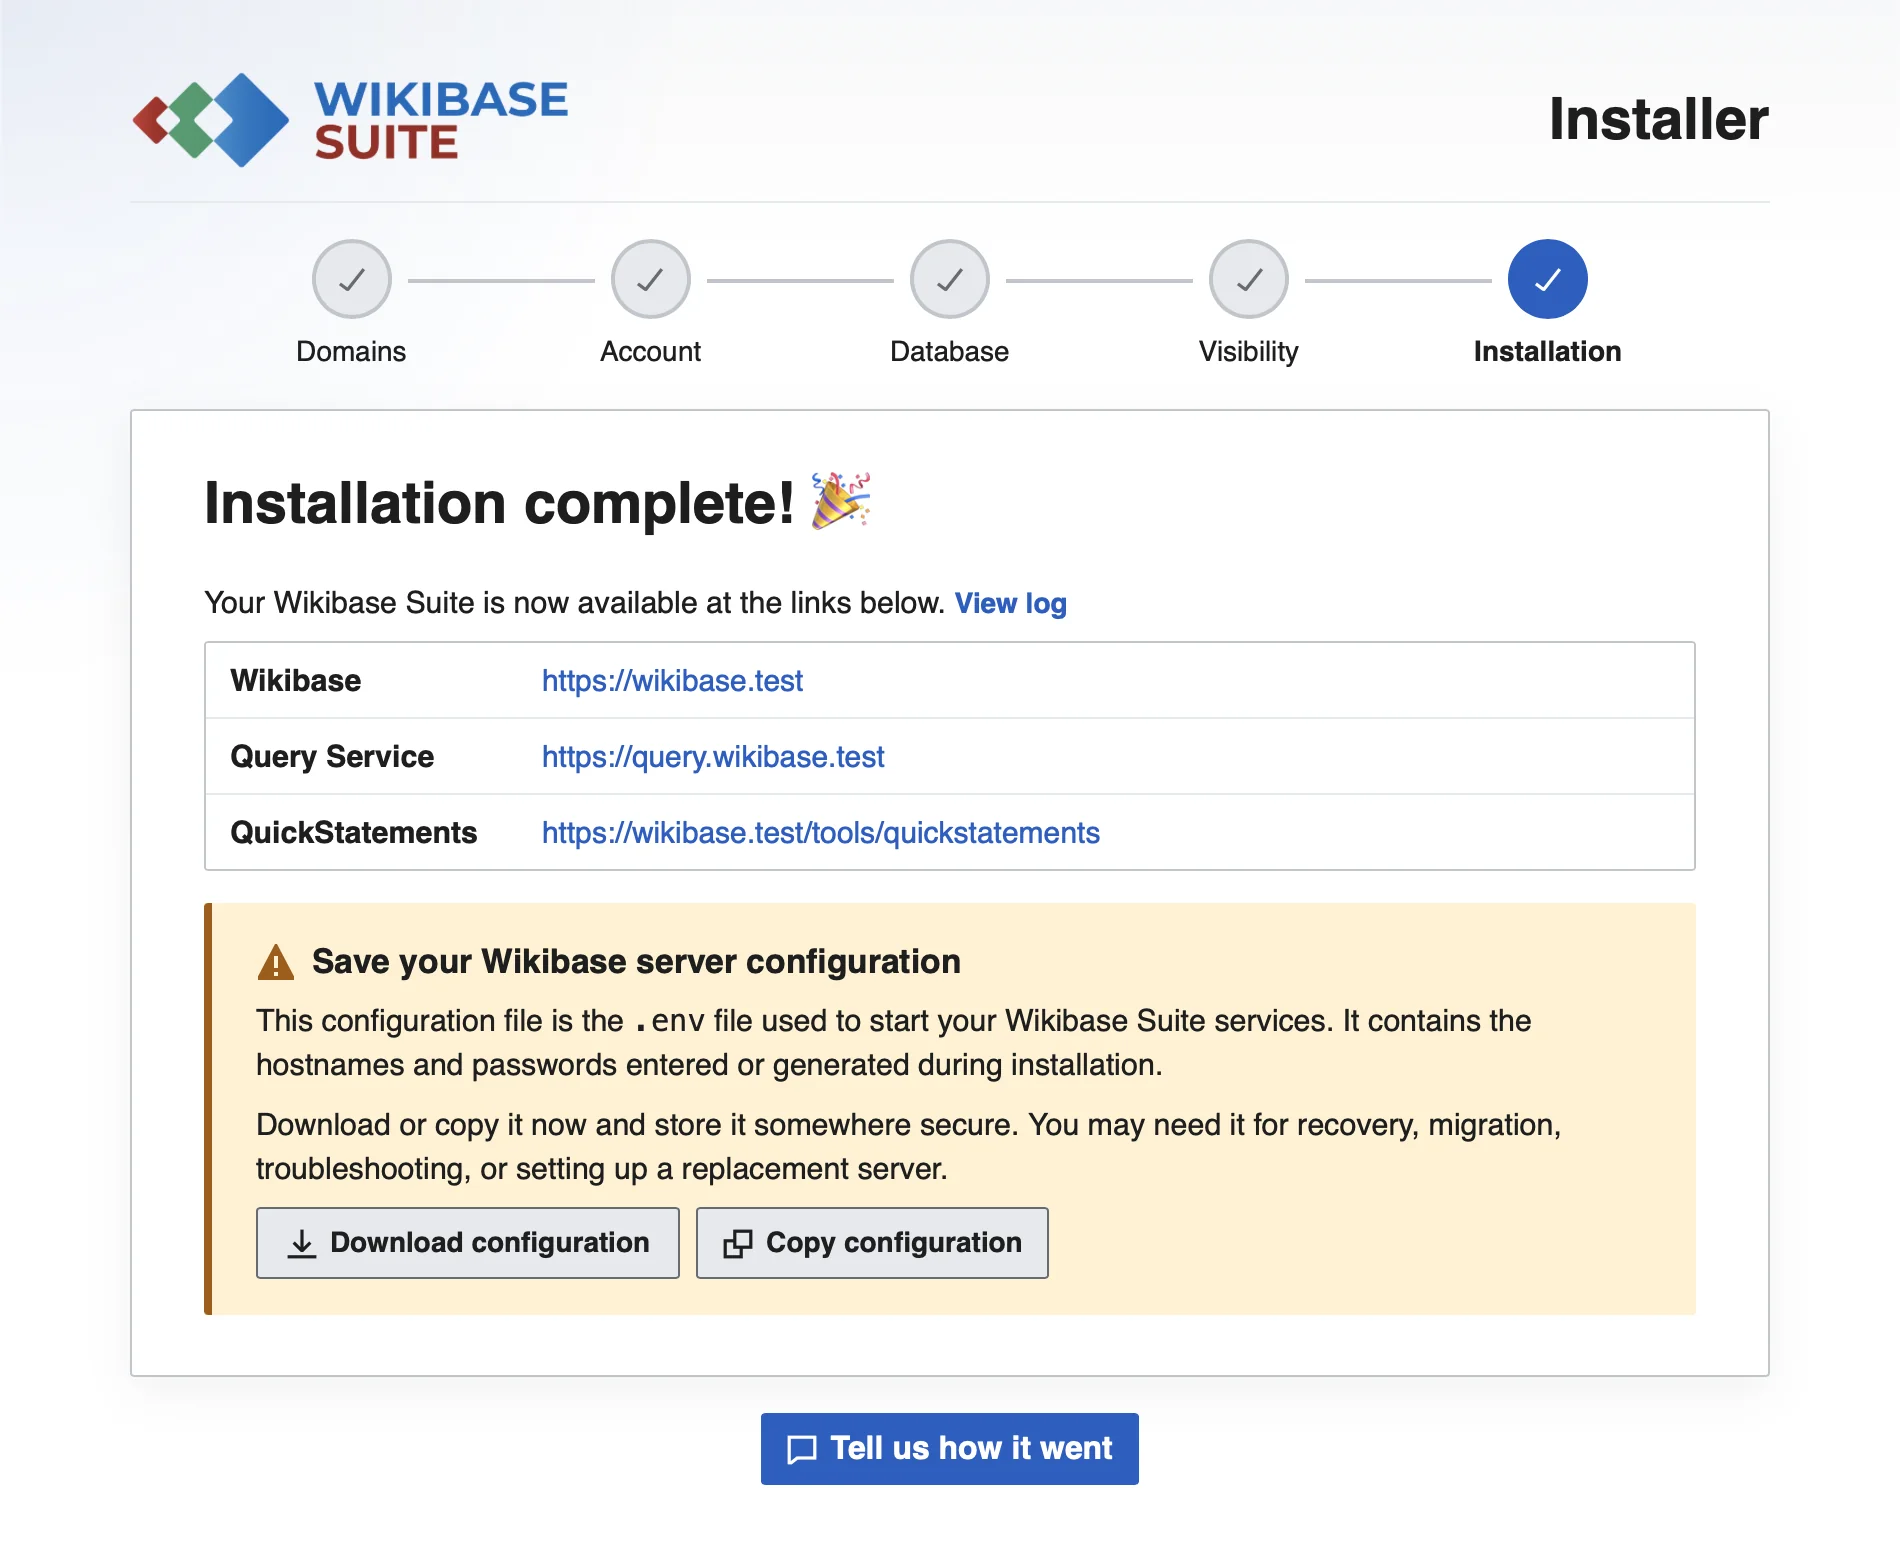
5. Run the installation
All Wikibase Suite components will be downloaded and installed. This may take a few minutes.
-
What gets installed?
Service What it does Wikibase MediaWiki + Wikibase extension: The main web interface where you create and manage your data MariaDB The database that stores all your data Elasticsearch Powers the search function Query Service Lets you search and explore your data with queries Query Service Frontend A visual web interface for running queries Query Service Updater Keeps the query index up to date automatically QuickStatements A tool for importing or editing large amounts of data at once Traefik Handles secure HTTPS connections automatically
🎉 You’re Done!
Your Wikibase is now up and running! You can immediately access:
- Your Wikibase at
yourdomain.com - The Query Service at
query.yourdomain.com - QuickStatements at
yourdomain.com/tools/quickstatements
📥 Important: Download your configuration file from the final screen of the installer and keep it somewhere safe. You may need it if you ever need to restore or update your installation.
Something Not Working?
- 📖 Check the Troubleshooting Guide for common issues and solutions
- 🐛 If you need help from the team, use the bug report form to start a conversation with the Wikibase engineers